Some merchants think sending post-purchase emails in WooCommerce is an optional, inconsequential task. They mistakenly assume that WooCommerce post-purchase emails are unnecessary and don’t impact customer experience.
The reality is that the WooCommerce order confirmation emails are more than just a polite gesture. They’re crucial for customer retention and engagement and hold the potential for higher open and click-through rates.
When you send a WooCommerce email after an order has been placed, it keeps the communication with the customer alive and increases their lifetime value.
However, designing attractive, branded post-purchase emails in WooCommerce can be tricky. In this guide, we discuss a few effective types of WooCommerce post-purchase emails, as well as how to send order confirmation emails in WooCommerce.
In this post:
- What is a WooCommerce post-purchase email?
- Types of WooCommerce post-purchase emails
- Benefits of sending email after purchase
- How to send a WooCommerce email after an order is made
- Wrap up
What is a WooCommerce post-purchase email?
A WooCommerce post-purchase email is an email, or series of emails, that you send to customers after they make a purchase from your WooCommerce store.
Although it’s possible to send a single post-purchase email, creating a series of messages can provide a better customer experience. For example, you could confirm the order, offer similar products or accessories to use with the item they purchased, and share tips on getting the most out of the product.
Types of WooCommerce post-purchase emails
1. Order confirmation email
An order confirmation email is the email a customer receives after making a purchase. It confirms their purchase details and gives an opportunity for you to make a good first impression. You can share helpful details about the item and include upsell or cross-sell products to increase the order value.
2. Thank-you email
A thank-you email expresses your gratitude for an action, e.g., signing up for your newsletter or making a purchase. In the below example, Paravel thanks customers for sharing their products on social media and “for making us a part of your travels this summer.”
3. Shipping confirmation email
A shipping confirmation email lets your customers know their item has been dispatched. Some, like the example from Holo Taco below, include the option to track the package. Buyers won’t worry about their order once they know the product is on its way, and the ability to track it can help them make any necessary arrangements for its arrival.
4. Educational email
Once your customer has bought their item, it can be helpful to give them tips on getting the most out of it. That’s what educational emails are for. From how to pair clothing to Beardbrand’s tips on white beards below, these emails are powerful ways to build authority and help your customers.
5. Cross-sell or marketing email
Once someone has purchased from you, if the experience was positive, there’s a good chance they would want to buy from you again. A marketing email, such as TOMS’ below, offers exclusive discounts. A cross-sell or upsell email would offer relevant products based on their behavior.
6. Feedback on the return process
A customized WooCommerce email after purchase can also be sent to collect valuable insights from customers who have returned or exchanged an item or canceled a subscription.
By allowing customers to share their experiences with returns, you can refine your processes and enhance satisfaction.
TunnelBear asks for honest feedback while reminding customers they can still use their services.
Benefits of sending email after purchase
WooCommerce emails sent after purchase can serve different goals, so it can make sense to split them over a series of messages. This avoids overloading your buyers by cramming everything into one email, and sending multiple emails is a good way of keeping in touch. They’ll see you in their inbox more than once, which helps to increase awareness of your brand.
There is no specific formula for the number of emails to send, but a handful is a good starting point. Here are some ideas to get the ball rolling:
- Keep the conversation going. Ask a question to encourage your customers to respond.
- Give post-purchase order info . Order confirmation, shipping confirmation, care tips—this email is to give order-related information.
- Ask for customer feedback. Ask them to leave a review, or to let you know how their experience was so you can make any necessary improvements.
- Promote related or additional products . This email would have upsells or cross-sells, where you make product recommendations based on their purchase history.
- Share useful order-related resources . Offer care tips or information to help them get the most out of their new purchase.
How to send a WooCommerce email after an order is made
WooCommerce allows you to send post-purchase emails from it if you wish. However, by default, they’re text-only and offer limited customization, so we recommend using an email marketing plugin for more control and stronger emails. For this tutorial, we’re going to use the Omnisend plugin , one of the top-rated plugins available for WooCommerce.
Step 1: Install Omnisend plugin for WooCommerce
To begin, head over to the Plugins page in your WordPress admin dashboard, select “Add New” and search for the “Omnisend for WordPress” plugin. Select “Install now” and once it’s done, select the “Activate” button.
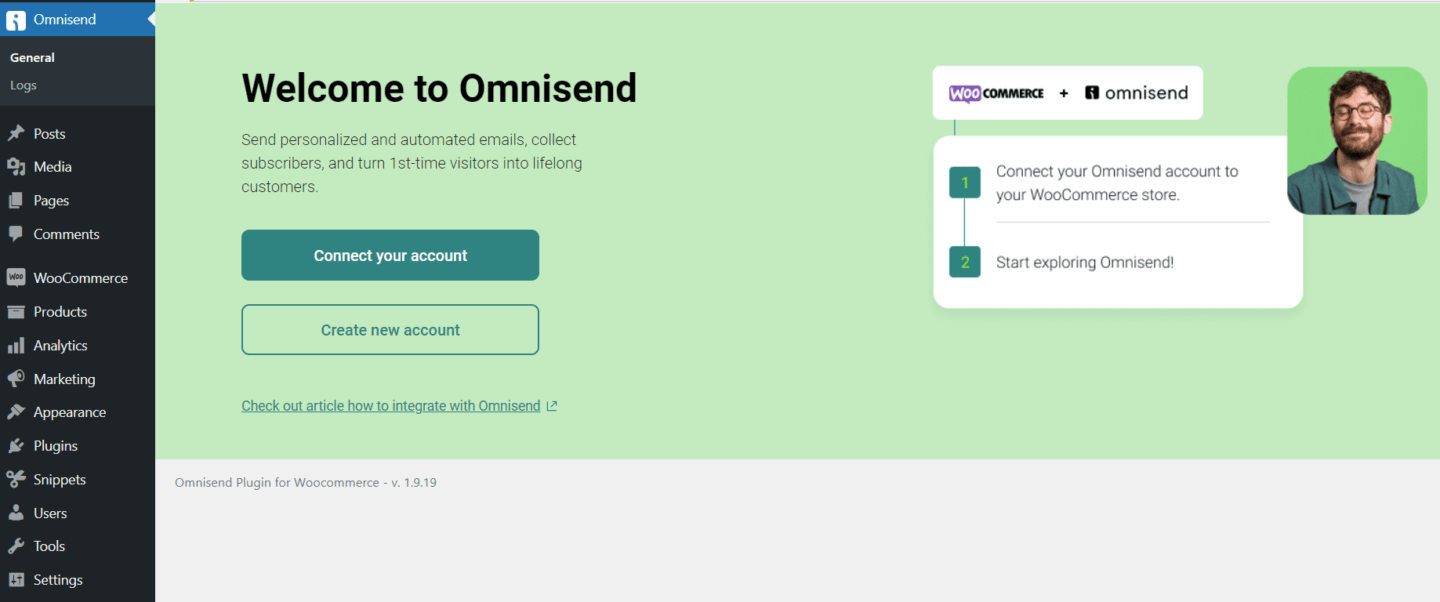
Go to the Omnisend plugin settings page, and click “Connect your account” as shown below. If you need to create an account first, you can click “Create new account” instead.
When you click “Connect your account” you’ll see the following popup, and need to click “Approve”:
That’s all there is to it. Now, it’s time to build the workflow.
Step 2: Create an order confirmation automation workflow
Creating an order confirmation automation workflow is very easy with Omnisend. You simply need to go to the “Automation” tab, click on the “Create workflow” button, and pick the Order Confirmation workflow.
Next, you want to adjust the trigger settings according to your preferences. The default trigger is set to Paid for Order, but you can tweak the settings to target your automation more specifically.
For instance, you can use the Audience Filter to target specific customers, the Exit conditions to stop the workflow when certain events happen, and Frequency to limit how often a customer can enter the workflow.
You can add and customize the messages you want to send in your order confirmation workflow. You can also use different channels, such as email, SMS, or push notifications, and add dynamic content, such as order details and the shipping address.
Step 3: Create a post-purchase automation workflow
Now that your account is active, it’s time to build your WooCommerce post-purchase email workflow.
Begin by selecting “Automation” from the main menu and then “Post-Purchase.” You’ll see other workflow types available, which you can look into later. For now, let’s stick with a post-purchase series.
Once you’ve selected “Post-Purchase” you can choose “Customize workflow” in the “Cross Sell” box:
Step 4: Customize the workflow
As a first step, edit the trigger for entering this workflow and sending the email. You can set this up so that an email is sent if any product is purchased, not just a selected product:
Once the trigger is set to your liking, you can choose the delay—this is the period between when they make a purchase and when the first email arrives. By default, it’s set to three days, but you can set it to anything you like. You can also experiment with different delays to discover if your audience has a preference.
Step 5: Design the email
After setting the delay, it’s time to edit the email. You can also set your subject line here—our free subject line tester will give you a score, plus tips to improve the score and a preview for both desktop and mobile devices. Set the preheader and sender name from this box as well.
Once you’ve set those details, click the “Edit content” button, and you’ll be taken to the email editor. This is where you customize your email to your liking. The email builder is drag-and-drop, so it’s incredibly easy to use. And because Omnisend has been built for ecommerce, there are handy features to help you—like easily adding discount codes or pulling products directly from your store.
Once it’s finished, click the green “Finish editing” button to complete the design, and then save your progress on the workflow editor page.
Your first WooCommerce after-purchase email is done—now it’s time to send yourself a test email to check how it looks, and then you’re ready to send it to your buyers.
Wrap up
Sending WooCommerce after-purchase emails is a powerful way to develop deeper relationships with your customers, and can increase customer LTV. While it’s possible to send just one WooCommerce confirmation email after an order has been placed, there are benefits to sending a series instead. You increase the touchpoints with your customers and can focus on one thing per email, like recommending a different product or requesting a review.
Check out the Omnisend blog for more tips and information on email marketing. For some help getting started, we recommend the following: